Friday, August 22, 2014

Starting Seeds . . .

There are probably as many ways starting seeds as there are hybridizers and probably all of us still experiment. This is the method that I find most satisfactory for me.

Remember, for a larger image, right click over the picture.


I always date and record the parents when making a cross. Having the date gives me some indication as to when they will be ready to harvest, sometime between 50 and 55 days. You cannot always count on a seed pod turning brown when it is ready, so I give them the pinch test. Take a pod between your thumb and forefinger and pinch it lightly. If it cracks open, It is ready to harvest.

A pod that has been harvested. Notice that there are 3 chambers in the pod. This matches the 3 anthers, the 3 chambers of the pistil and if you open up a flower to the base, the ovary also has 3 chambers, after all, this is where the seed pod is formed.


As soon as the seeds are harvested, and before drying, I place them in a plastic zip lock bag and place them in the crisper drawer of the refrigerator where they will stay for at least 3 weeks before planting. Probably if you leave them in the fridge longer, germination will be higher. Notice the cross tag stays with the seeds. I know other hybridizers who will let their seed dry out before refrigerating. Whatever works best for you!

Years ago while speaking at the original CanAm meeting, Melanie Mason and I had a discussion as to whether soaking seeds prior to planting gets them started more quickly. I was pro soaking and Melanie was opposed. So I thought the next year I would do a little experiment to prove her wrong. I soaked some seeds for 3 days and then planted them. I also planted some seed the day I started soaking the others. The soaked seeds began showing green above the potting soil in 4 days (soaked 3 and germinated in 4) a total of 7 days. The seeds planted began showing green above the potting soil in 7 days.Melanie won that one!


This is a seed that has germinated. You can see the "tap" root to the right and the green foliage beginning on the left.
I begin with a 1020 tray with a 6 compartment insert. These compartments are approximately 2" X 5" X 7". I would really prefer to have them deeper, but this is what I use for germinating seeds.
I fill each compartment with a seed starting mix slightly compacted. I then score 4 rows in each compartment. This helps me keep the seeds in a straight row.

12 to 15 seeds are planted in each row which gives me an average of 50 seeds per compartment. This gives me a total of about 250 seeds per flat. Notice each cross is marked with the parentage.

The seeds are then covered with about ½" of the seed starting mix. I number and date each tray so I will know approximately when to transplant, normally about 6 weeks.
Seeds begin showing above the seed starting mix at 5 or 6 days.
Here are 4 trays which total approximately 1000 seeds in a 24" X 40" space. You may not be able to see it, but I use an old electric blanket for some bottom heat. The blanket is wrapped in plastic sheeting to keep it from getting wet. I am a proponent of bottom heat but this does not come from any scientific research.
These are the seedlings at about 4 weeks. In a couple more weeks they will be ready for transplanting. Yes, the roots are intertwined in the trays and some roots will be damaged when removing the seedlings but if you are careful, damage can be kept to the minimum.
Here is an image which shows the seedlings and the roots when removed from the starting trays before transplanting.
Remember when I stated that we continue to experiment to find a better way? One year I tried starting seeds in peat pots with little success. I know that Bill Waldrop and others start their seeds directly in peat pots with great success. It just didn't work for me.


Please don't interpret me as an expert on starting seeds. This is the method that works for me and I am sure that you will find a method that works for you. This information may be worth exctly what you paid for it. This year I started my seeds in late July so they will be ready to transplant soon.

Life is very, very good.

Lee

Sunday, July 20, 2014

Potpourri . . .

Most of you have heard me extol the virtues of the Maid-Rite sandwich which is only available in Iowa and in other states with their border close to that of Iowa. I try to attend the Pollen Dabbers meeting in Marshalltown, IA every year to see Iowa friends, visit our parents' graves and to eat Maid-Rites, not necessarily in that order. Since lunch is on your own on Saturday at the Pollen Dabbers meeting, many of us head to Taylor's Maid-Rite shop, one of the few remaining original stores in the chain.

Also, close to my home town of Colfax, IA, there is a Maid-Rite shop in Newton which is about 10 miles away. A college friend of mine owns it which gives me a good excuse to visit that one also.

I would like to share the following picture with you taken two years ago.

Guess where? Yep, Taylor's Maid-Rite shop in Marshalltown. Lee, Don Lovell and Selwyn Rash, all enjoying a Maid-Rite lunch break at Pollen Dabbers. Can't you see the smile on our faces?

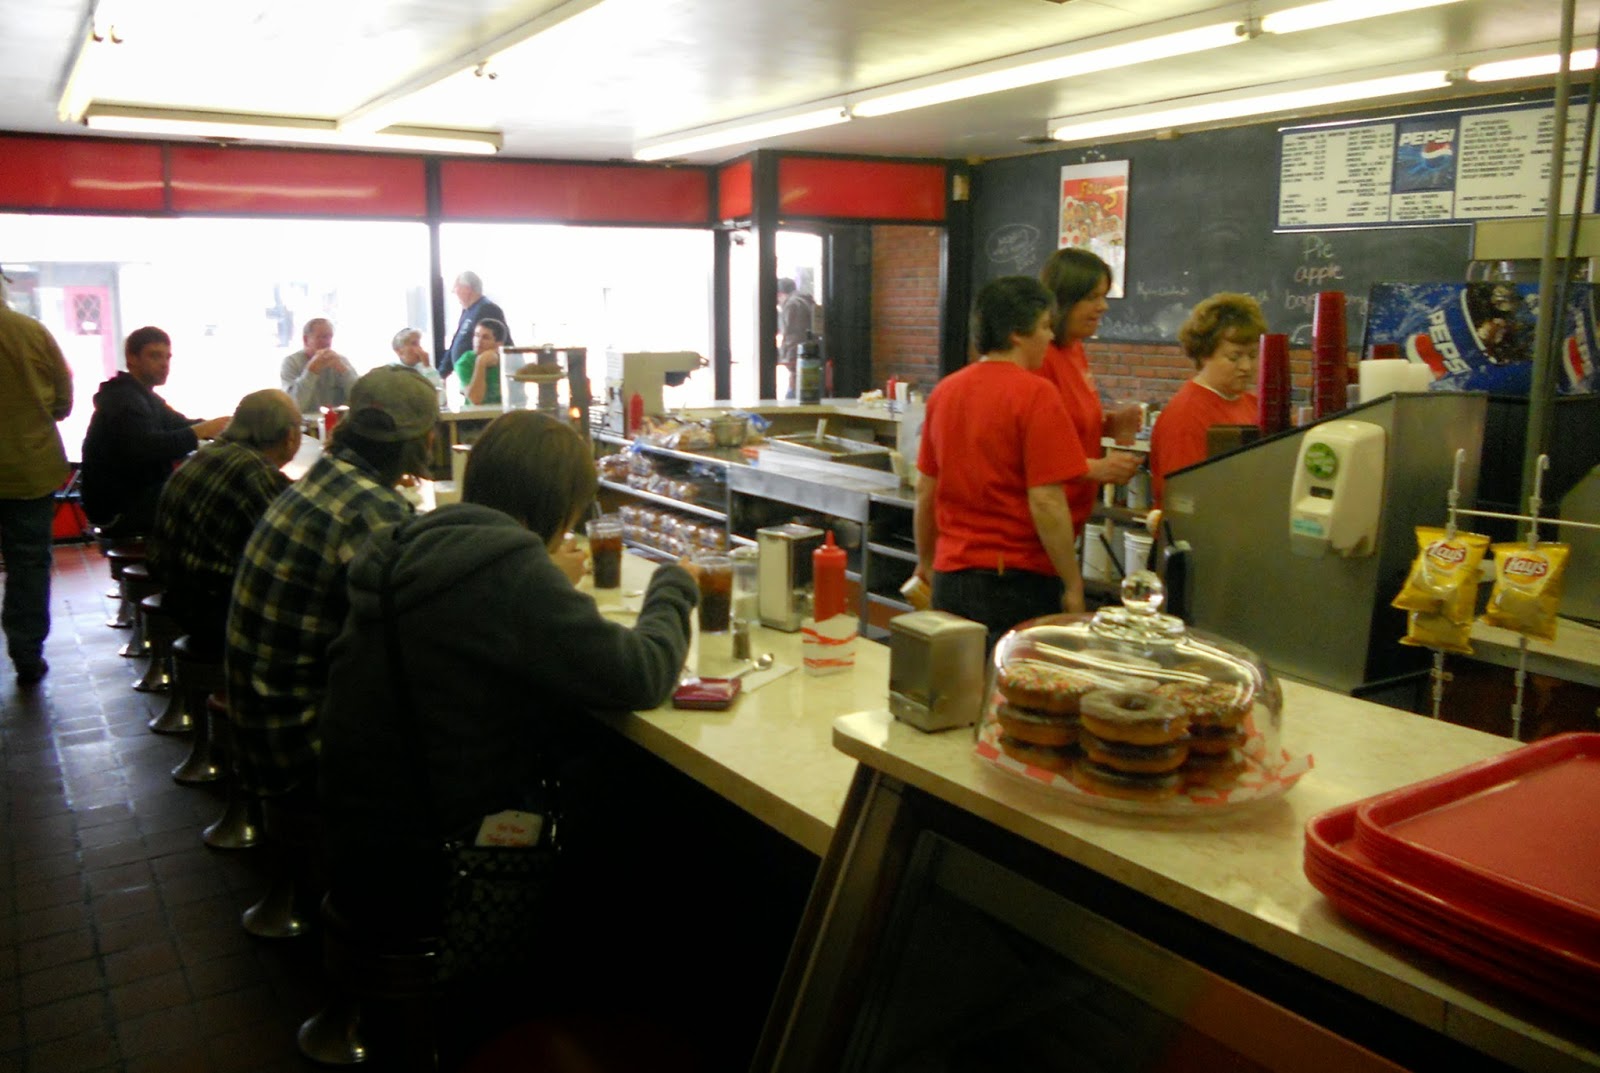
 This picture shows the inside of the Newton, IA Maid-Rite shop. You can see they are not fancy. I have made many visits here beginning way back when I was a kid my parents made their weekly visit to this shop.

For those of you who are not familiar with the Maid-Rite sandwich, I am showing the following picture. Maid-Rites are simply loose hamburger that is steam cooked, not fried. WOW! I heard that a member of our club, Libby Bell, drove an hour out of her way after attending the national in Minnesota just to find a Maid-Rite shop. She ordered one and liked it so well, she ordered a second. Good going, Libby.


Now to the daylily seedlings. I am going to show a few of my favorites.

Seedling 4007 (Red Saphire X Fringy)

Seedling 4020 (Marilyn Morss Johnson X Seedling)
The flower is stunning with both color and form

Seedling 4020 (Angels Gather Around X Fringy)
David Kirchhoff was here when this bloomed. I asked him if it was a double and he said no, it is a sculpted daylily because all of the ruffling is coming from the mid-ribs. Folks, this may fit the AHS definition of sculpted flower, but not mine. To me, a sculpted flower has grooves. How we ever got this form as sculpted, I sure don[t know.

Seedling 4063 (Cimarron Rose X Barbara Mandrell)

Seedling 1004 (Doug's Caress X Camelot Red)
This is one of my particular favorites and has been used extensively in my red hybridizing program.

I hope you enjoy looking at these seedlings. Remember, a left click over the image will give you a larger picture.

Life is very, very good.

Lee


Tuesday, July 15, 2014

Seedlings blooming this year . . .

Since seeing Jeff Salter's H. 'Camelot Red' (2010) bloom several years ago, I have become fascinated with red daylilies and and began to hybridize them as my main focus. Then I saw David Kirchhoff's H. 'BarbaraMandrell' and I was even more hooked. They both have the round, full form that I prefer, and the colors are clear and saturated. Below are some of the red seedlings that I particularly like and am also showing the parents.

H. 'Barbara Mandrell'
(Kirchhoff, 2009)
Seedling 1004
(Camelot Red X Doug's Caress)


Seedling 2041 [(Barbara Mandrell) X (Seedling 1004 Camelot Red X Doug's Caress)]


Seedling 2010
(Rockets Bursting in Air X Barbara Mandrell)


Seedling 2008
[(Santa's Little Helper X Running Hot) X Home of the Free] 


Seedling 4025
(Seedling 2008 X Seedling 2010)
This seedling showed a much more intense GOLD edge this year on re-bloom.


Seedling 2008
[(Santa's Little Helper X Running Hot) X Home of the Free] 

Waldrop Seedling
(Santa's Little Helper X Running Hot)

Seedling 4064
[(Santa's Little Helper X Running Hot) X (Home of the Free)
X (Santa's Little Helper X Running Hot)]

H. 'Cimarron Rose'
(Salter, J. 2005)


H. 'Juanita Manley'
(Pickles 2011)


Seedling 2009
(Juanita Manley X Cimarron Rose

 H. 'Groovin'' (Pickles 2011)
Verna Habermel sent me this picture of Groovin' taken in her garden. One of the most deeply grooved daylilies I have seen. It is spectacular if I do say so myself. This is my definition of a sculpted daylily, not one with a lot of fringing on the mid-ribs. Just sayin'.

I don't know what I am doing wrong, but I cannot get H. 'Juanita Manley' (Pickles 2011) to stay next to the flower.

I hope you enjoy looking at these flowers as much as I do. Remember, to see a larger image, right click over the picture.

Life is very, very good.

Lee


Friday, June 27, 2014

2014 Blooming Seedlings . . .


The outside bloom season has been excellent so far. Like many other parts of the country, the scapes are top budded with very little branching. From the past seasons, I know that this is not typical of these seedlings. I will watch them another year and hope next year's weather is more friendly. I really like the saturated color, the blue eye and the round form that I prefer.


H. 'Bluegrass Memories'
(Preuss, 2006)
This is the common parent of all four seedlings.


H. 'Desire of Nations'
(Emmerich, 2008)
This is the common parent of three of the seedlings shown.


H. 'Heartbeat of Heaven'
(Emmerich, 2004)
 Seedling No. 3077
(Desire of Nations X Bluegrass Memories)

 Seedling No. 2065
(Desire of Nations X Bluegrass Memories)

 Seedling No. 2091
(Bluegrass Memories X Desire of Nations)

 Seedling No. 3067
(Heartbeat of Heaven X Bluegrass Memories)
The triple edge on this seedling is special.

I hope you enjoy looking at these seedlings. To me, this is what daylilies are all about, hybridizing and the first sight of the resulting crosses.

To see the images in a larger size, just left click over the image.

Life is very, very good.

Lee
 

Tuesday, April 1, 2014

Waterbed Survives Winter . . .

Most of you have had a very hard winter this year, including us. Last fall I put about 120 potted seedlings in a water bed to see how they would take the winter, not knowing that we would have one of the coldest winters in history. As the winter came upon us, I expected to lose many of them, some Ev, some Sev, and a very few were Dor. They were in the freeze, thaw, freeze mode all winter standing in water.

Monday, I decided to go out and see the devastation and was completely surprised. NOT ONE POTTED PLANT WAS DEAD, NOT ONE!


Below is a picture of the waterbed that I took today, April 1, 2014, and NO, this is not an April Fool's joke.

I hate to do this, but I guess I have to give Tommy credit for the waterbed idea, but don't tell him. Besides, I am younger and better looking than him.

Life is very, very good.

Lee